Image Quality and Sizing Images for the Web
If you're new to posting color photography on the Web, you'll quickly discover that
most scanned images are too large to post without first reducing their size.
To post an image on the web, you may need to reduce both its dimensions and
its file size. This is done in two steps:
-
1) resizing the image to reduce its dimensions, and
2) compressing its file size using JPEG to shorten its Web download time.
Each of these steps removes information from the image to make it smaller and by doing so may also
degrade the quality of the image.
This page will help you get the best from images you prepare for the Web by:
The Image
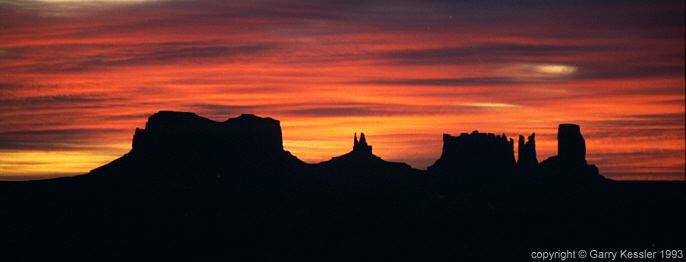
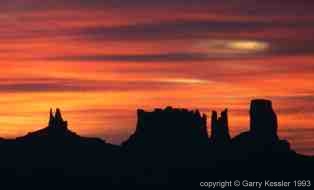
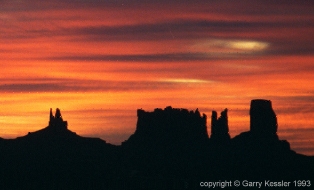
Dawn from the porch at Gouldings during the seasonal monsoon flow. Monument Valley, August 1993.
Canon AE1-P, 70-210 zoom with 2x converter (I think), Kodak Gold 200 film.
Scanned from the negative with an HP Photosmart scanner, 2400 dpi and 24 bit color.
The image is cropped and reduced to 20% of its original size.
Dimensions and File Size
Most scanned images are too large to be conveniently downloaded on the Web.
Posting guidelines for two popular photography forums are:
(Note, for portrait images photocritique
further suggests a height limit of 550 pixels.)
Some typical image sizes for a 35mm image scanned with an HP Photosmart scanner are:
| | Format | Dimensions | DPI | File Size |
|
| negative | TIFF | 3456x2384 | 2400 | 24M
|
| negative | TIFF | 1748X1192 | 1200 | 6.1M | 1.5x1 inch
|
| print | TIFF | 1773x1243 | 300 | 6.5M | 6x4 inches
|
| print | TIFF | 667x443 | 150 | 867K
|
As you can see most of the scans above would need both their dimensions and file size reduced to
meet posting guidelines. The low resolution (150 dpi) print, however, is dimensionally close to
posting guidelines without further size reduction and 150 dpi does produce a good quality
print image. However, its 867K file size is too large for Web posting
guidelines and still requires file compression.
An image's file size is related to the image format used. In the table above the scanner captured
the image in TIFF format. TIFF is used to capture and process images because it's a loss-less format,
which means that it captures and maintains the maximum amount of information possible in the image.
This also produces and maintains the best possible image quality. However, it also produces files that
are too large for posting on the Web. To produce smaller files, images are converted to JPEG format
and compressed (in a process explained below) before they're posted on the Web.
For more about image formats see "A Word about Image Formats".
Scanning images at higher resolutions like 2400 dpi isn't necessary for posting on the Web. After
all you're just going to remove the extra pixels in the process of shrinking the image's size in
preparation for posting. Nevertheless, there are four reasons that I still prefer to scan from
negatives at 2400 dpi:
- negatives contain more detail than prints,
- negatives are full image, prints are often cropped,
- prints already have someone else's color corrections built in, and
- I like to keep the master scan at highest resolution for other possible future uses.
Resizing Images
If you have a larger image, such as a scanned negative, you will need to resize it to meet posting
guidelines. While there are a few ways to change the dimensions of an image, here we'll simply
resize our image from 3456x2384 to 667x460 pixels. Simply leaving out four out of every five
dots doesn't produce very good results, so software packages use more sophisticated 'resampling'
techniques for resizing:
- smoothing techniques to reduce graininess when shrinking images, and
- edge preserving techniques to maintain sharpness when enlarging them.
A non-smooth technique was used to shrink the image below.
Further below is the same image resampled using a smooth technique for
comparison. Clicking on the image displays enlarged samples and a survey
of resampling methods available in a few software packages.
By leaving dots out of the image, the image's file size shrinks in proportion to its dimensions.
Resizing the 3456x2384 scan to 667x460, like the print, produces a comparably sized file. The resized
TIFF is 900K, regardless of resizing method, while the print, which is slightly smaller at 667x443
is 867K.
Compressing Image Files with JPEG
As you can see, resizing alone won't necessarily produce an image file small enough for
downloading on the Web. To further reduce the file's size, JPEG compression is used. However,
just like resizing, JPEG compression is lossy, which means that image quality drops off as compression
levels rise. So as a rule, while images are captured and processed in a loss-less format, like TIFF,
they're only converted to JPEG and saved as a final step.
Compressing an image is a tradeoff between:
- desired file size, and
- desired image quality.
JPEG Compression and Image Quality
JPEG compression level controls the tradeoff between image quality and file size.
Software packages, such as those listed below, use a variety of methods to
set the JPEG compression level.
While each package uses a simple approach to set the desired amount of compression, approaches
among packages vary so widely that you may need more of an explanation
than just the generic rule of thumb below.
As a general rule*, however, on a compression level scale
of 1-100 with 1 being best quality
- settings around 10-15 produce excellent results, and
- settings around 25-30 produce good results.
Note (*)
not all packages use a compression level scale. For equivalent settings for various software packages,
see more of an explanation.
Image Quality
To illustrate the effects of JPEG compression on image quality, we'll look at a section of the image
above at compression levels 10, 50 and 75. Compression effects are most easily seen when the image is
enlarged, and clicking on any of the samples below displays an enlargement for this purpose. Review
these enlargements to familiarize yourself with the visible effects of over-compressing an image and
to recognize these same effects if they appear in your images.
The sample above shows the image at compression level 10. As you can see by clicking on the image,
there is little quality loss at this level. In fact at normal size (1X) this sample is
indistinguishable from a sample made at compression level 1 (best quality). Compression level 10
does, however, significantly reduce the file size from 154K to 41K.
|
| 
|
|
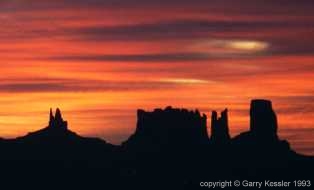
| Microsoft Photo Editor 3.0, quality factor 50, size 17K
|
At compression levels greater than 30 you'll usually see compression artifacts appearing. These are
often most noticeable along sharp boundaries between areas of contrasting solid colors as seen along
the silhouette line in this image.
Microsoft Photo Editor is a commonly available software package often preloaded onto PCs running Windows95+ and NT.
It is capable of producing JPEG files of similar quality to PaintShopPro. However, the default
JPEG quality factor is set to 50, which is equivalent to compression level 50 in PaintShopPro.
As you can see when you click on the image above, this setting does produce a visible loss in image quality.
Note the slight whitish edging around the left-most peaks (known as the King on His Throne). To avoid
these effects you must manually set the JPG quality factor to a higher value before saving your image.
|
| Paint Shop Pro 5.01, compression level 75, size 10K
|
At even higher compression levels the quality losses are even more apparent. In this sample at level
75 you can see pronounced edging around the peaks and a blocky effect in the smoother areas of sky.
Checking out Software Packages
|
| Picture Window 2.0, quality 100%, size 248K
|
Occasionally when checking out new software, you may encounter unexpected behavior. The image
above was compressed with older software that had difficulty on newer Pentium MMX hardware. The image
on screen above looks just fine until examined under magnification.
Digital Light & Color has since corrected the problem and Picture Window 2.5 was used to produce the
full image at the top of this page.
Summary of Processing Guidelines for Sizing Images for Web Posting
- Capture images and work in a loss-less format like TIFF,
- Use smooth resizing methods for reducing image dimensions,
- Use JPEG format only to compress and save the final image, and
- Use JPEG compression levels at 10 and 30 for best results.
Links to Software Packages
This is by no means intended to be an exhaustive survey of software packages.
There are many excellent software packages available for creating images for the web with a wide range of
capabilities and prices. A few are sampled here:


